360 Degrees, No Backboard, Nothin' but Net.Many of our users ask us why not include a backboard? One of the main reasons we decided to not include the backboard is to make the unit adjustable, collapsible, and portable. In addition, by removing the backboard, we increase the playing area from 180 degrees to 360 degrees, doubling in size. Although science and physics show that the bank shot (within 12 feet) is more accurate than a swish, in the NBA and college game bank shots are rare. How many bank shots (besides layups) were made in the last NBA playoff game?
With no backboard, we allow players to be able to shoot anywhere on the court. The 360 degree playing area forces the player to identify the target from anywhere on the court and make the necessary shot adjustments to make the shot. With 360 Shooter, players get more shots, more repetitions, and become more accurate shooters! |
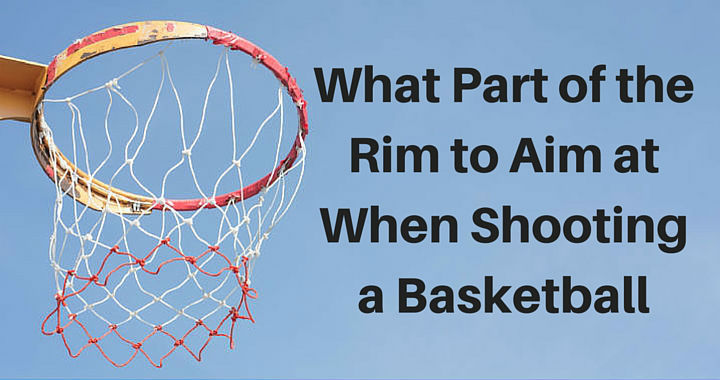
At 360 Shooter, we believe shooters should always focus on the ring that’s in the middle, sometimes called the NEST. That's why we removed the backboard to force players to aim for the NEST. Not the front of the rim (ball will fall short) or the back of the rim (ball will bounce out). If you focus on the middle of the rim, you will make more shots. With the 360 playing area, a shooter views the rim from the top of the key, wing, corner, elbows, etc. but the locations always change depending on where you are at on the court. Wherever a player is on the court, there will always be a ring that’s placed in the middle of the rim that can be used as a target. With the correct aim on the target, players with perfect form and correct follow-through, players will give themselves a better chance of making shots consistently.
Where to AIM? The NEST!
Perfect Shooting Form.Developing the perfect shooting form is critical in having an accurate shot, as you need to have the proper balance, technique, and mechanics. At 360 Shooter, we believe that improving your shooting form can help you go from an average shooter to an elite shooter. Improve your form, take repetitions, and make shots!
|
Load - Raise - Shoot!
In having the perfect shooting form, there is much debate in the basketball community of what is the perfect shooting form. Should a player dip or not dip the ball? Where do you place your fingers? Is a one motion shooter better than a two motion shooter? Should you take a hop or 1-2 step into the shot? Should your feet be straight on the rim or off 30-45 degrees? Do you follow through with 1 or 2 fingers?
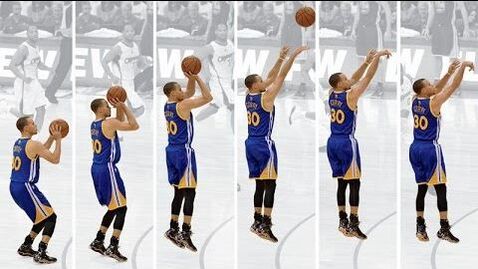
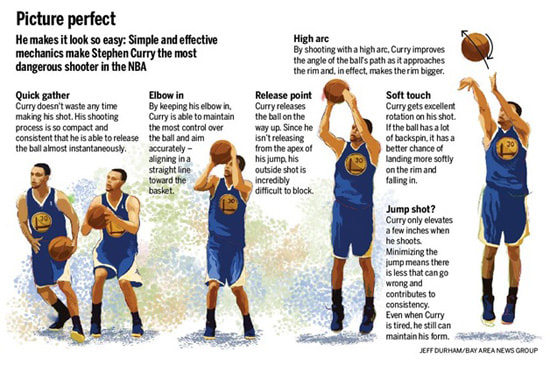
At 360 Shooter, we believe the above shooting details are important but by focusing on the BIG picture of form shooting, the small technicalities will fall into place. We firmly believe that the best shooters have an effortless shot with a quick release, all supported with perfect form shooting. A perfect form is something that is can be done over and over and over, with the same mechanics and techniques. We favor the shooting mechanics of LOAD, RAISE, and SHOOT!
LOAD:
Load is a position when the player brings the elbow back with the ball around the stomach to waist area. Here the palm is pointed forward so there is a natural 90-degree bend at the wrist. At Load, the forearm is parallel to the floor and elbow/upper arm is angled slightly back. You immediately cushion the ball to this position when catching the ball off the pass or picking the ball up off the dribble.
RAISE:
Raise is the motion when you Raise the ball from the Load position to the front of your shoulder. For those non-dippers, this is traditionally where you want you to start the shot motion process. The ball must transition from Load to RAISE position and allow a shooting release in a fluid, constant motion.
SHOOT:
The final phase is the shoot phase where you release the ball and follow-through with your shot. Your wrists need to be very relaxed, and your fingers need to be pointed at the rim. You should be able to see your fingers at the top of the backboard or pointing into the rim (hand in cookie jar). You shooting arm should be in a 45-48 degree angle while your guide hand should be pointing straight up in the air or slightly forward to the rim. Make sure you hold this position until the ball hits the target.
In utilizing the LOAD, RAISE, and SHOOT process, your goal is to remove all hitches and pauses in the ENTIRE shooting motion and have a quick and fluid shot. During the Raise phase, make sure to extend your legs and begin to raise your hips. Once you Raise, the ball and body should be moving up all at the same time.
Keys to perfect form shooting:
- Are your legs balanced?
- Is your upper torso balanced?
- Is your shooting hand under the ball to provide good support?
- Is your off-hand securing the ball so it doesn't get stripped?
- Are you relaxed?
- Is your shot fluid?
- Do you have proper rhythm and timing when loading, raising, and shooting the ball?
- Are your mechanics consistent on every shot?


